Welcome to the HubSpot Deal Carnival. While you learn how to create a fun, in-browser game using the Phaser.js game framework using skills you’ve already got as a web developer, you’ll also get familiar with the HubSpot platform. In fact, we’re going to use HubSpot’s APIs to make our games work, and HubSpot’s platform will even make it possible for us to deploy our frontends, securely interact with HubSpot APIs, and link our games together into a Vue.js-backed scoreboard.
This is the first tutorial in a series, and it’s all about getting you started and productive (while learning a new trick or two). We’ll get you signed up and familiar with HubSpot’s platform and dev tools, then you’ll build a Deal Fishing minigame. Finally, we’ll integrate the game with HubSpot’s contacts API by using HubSpot Serverless Functions.
Getting set up with HubSpot
Sign up for HubSpot
We’re going to sign up for a HubSpot developer account. That’ll let us have a sandbox to safely explore the APIs, and build our carnival games. https://app.hubspot.com/signup/standalone-cms-developer
Once you’ve got that, we’re ready to get using any HubSpot features. We’ll be using the HubSpot CMS to deploy our games, the HubSpot CLI to develop locally and push our game to HubSpot’s cloud-based CRM, and we’ll use HubSpot Serverless Functions to securely speak to the various APIs we’ll be using.
Using the HubSpot CLI
To get started with the CLI, you can follow the instructions here:
// TODO:
https://developers.hubspot.com/docs/cms/developer-reference/local-development-cms-cli
Downloading and configuring it
To download the HubSpot CLI:
npm install -g @hubspot/cms-cli
That’ll install it globally. If you ever need a reference on the full scope of the CLI and how it works for local development, just check out this page.
Next, let’s initialize and authenticate in the appropriate folder. Create a new folder – maybe call it hubspot-local – and move into it:
mkdir hubspot-local
cd hubspot-local
hs init
You’ll first get a prompt to press Enter to get sent to a website to generate your personal CMS access key. Press enter!
Select the account you created above – if it doesn’t show up by default, press the “View your other accounts” button. Make sure you’re selecting the sandbox account you created above, or else you might send make a mess of your organization’s HubSpot data.
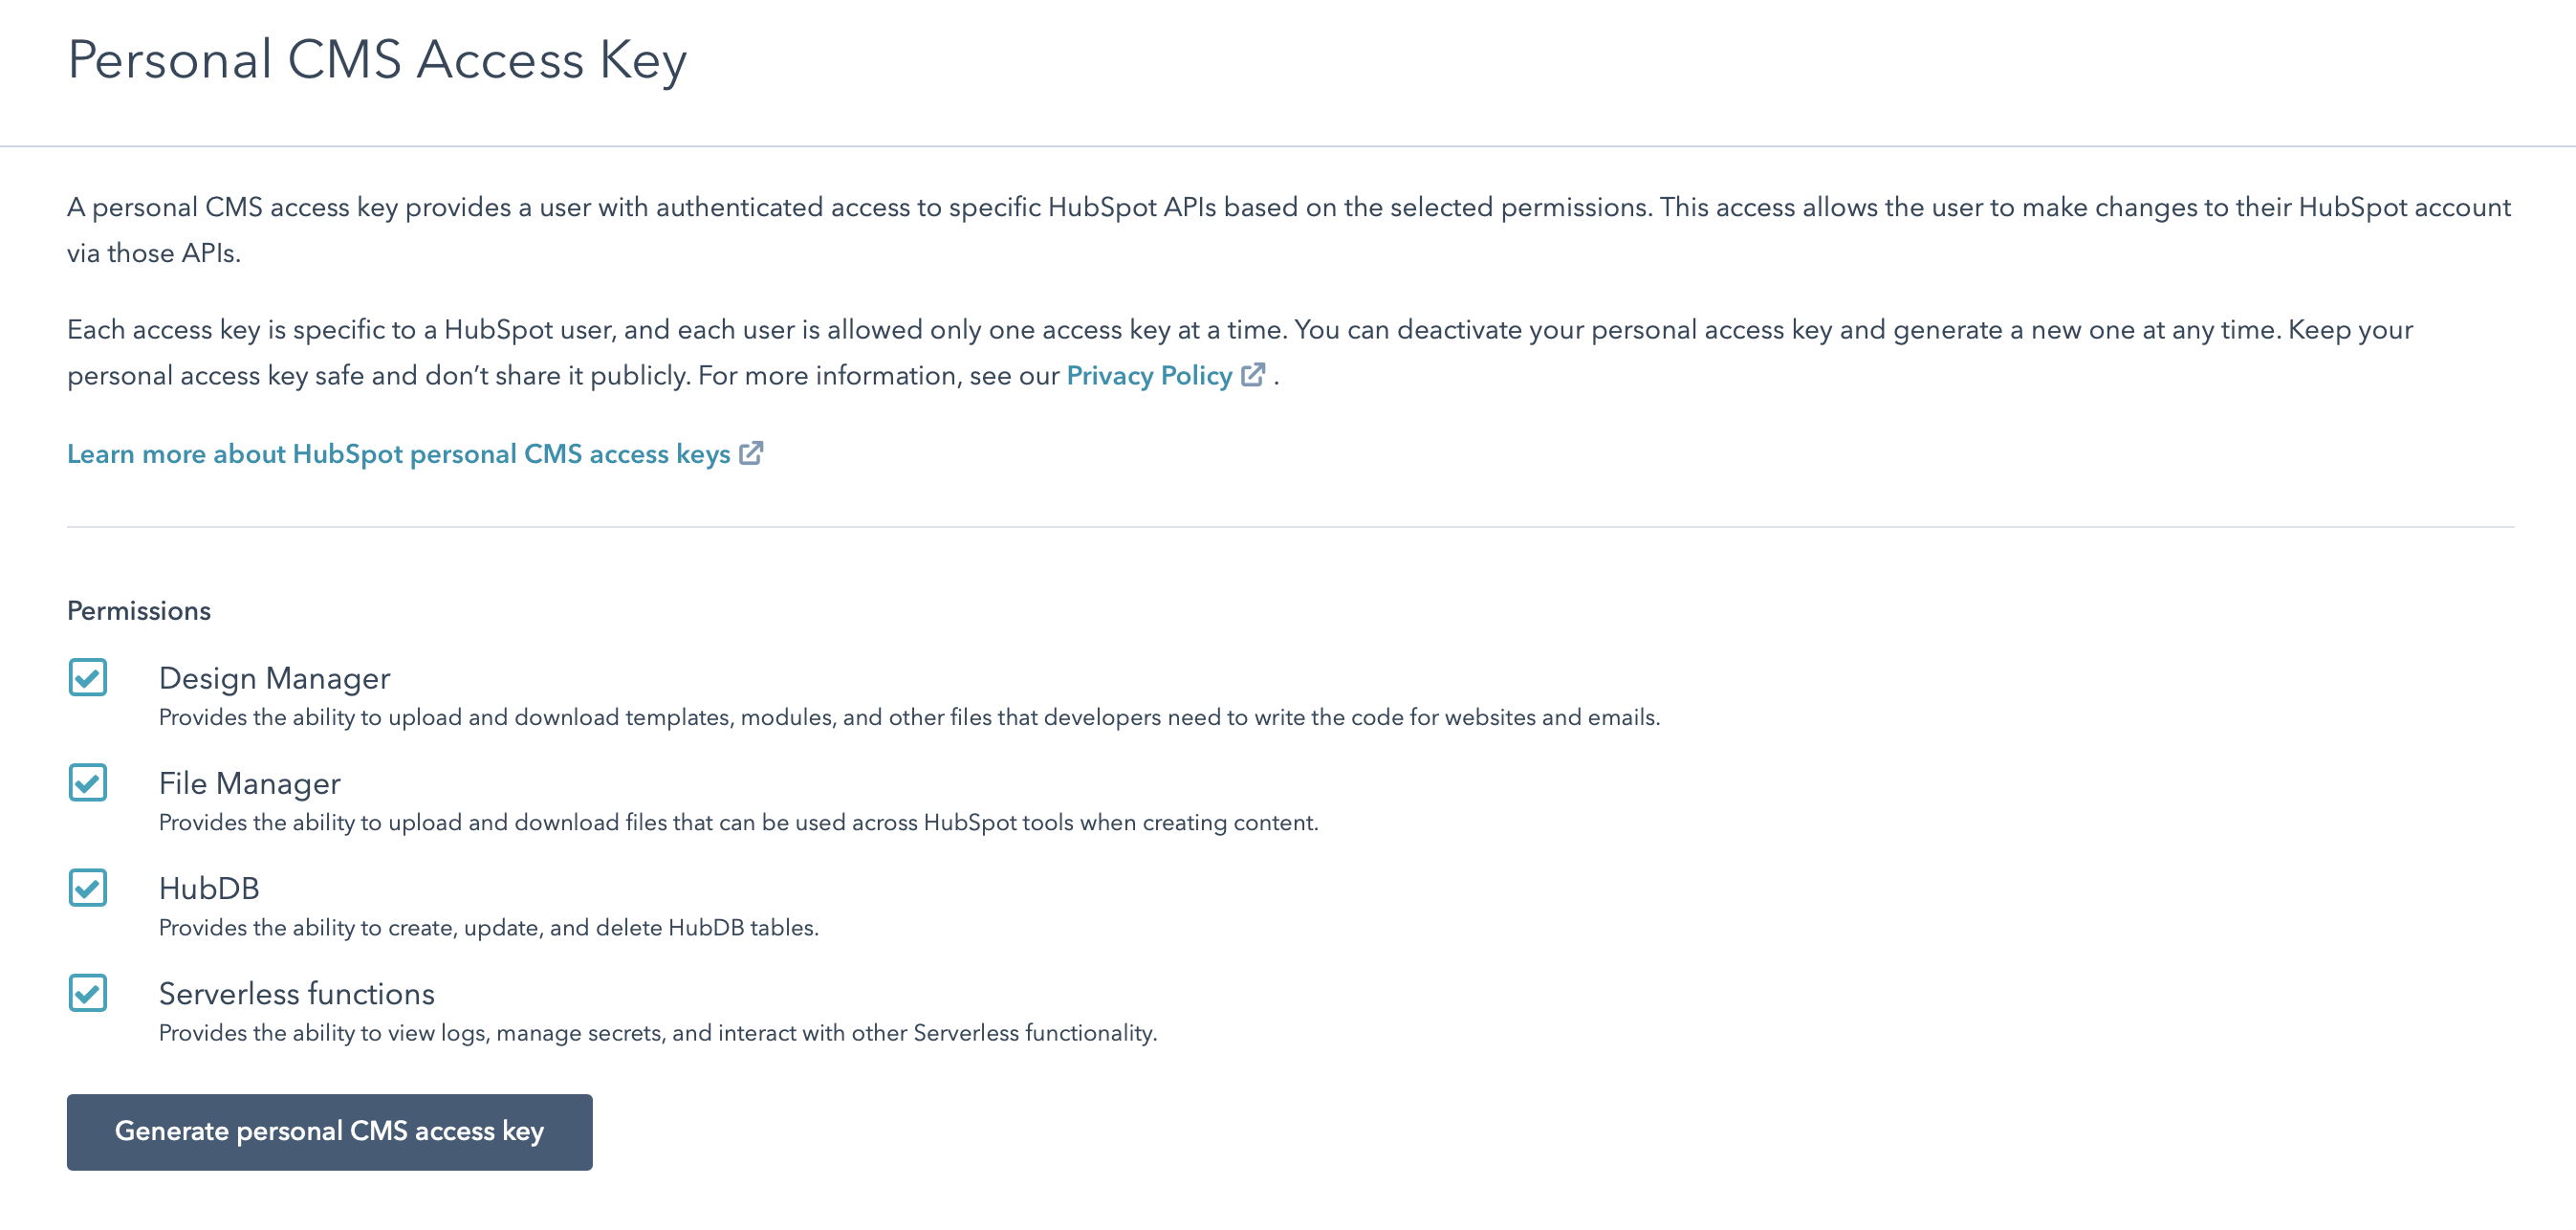
At the next screen, be sure to select all the checkboxes under “Permissions.” That’ll allow us to get the full local development experience, and to complete this tutorial without a hitch. And as a security note, this CMS access key is for your HubSpot CLI – not for the game you’ll be making.
On the next screen you can copy your personal CMS access key; go back to your terminal and paste it there. Give the account a nickname you’ll remember (I used carnival-account ). You can now open up the hubspot.config.yml file in this folder, and you’ll see all the info you just entered.
Bonus tip: if you’ve got many accounts added to your CLI already, it might be a good idea to switch the defaultPortal value to the nickname of the new sandbox account you added. That way, you won’t accidentally make changes to someplace you shouldn’t.
Creating and pushing your first module
Now that we’re ready to use the CLI, let’s create a module. The module is where we’ll be doing our coding, and it’s what will get deployed to HubSpot – so that we can see our game deployed and playable in the cloud, simply by navigating to a HubSpot browser. Through modules we can also get the game to interact with Serverless Functions, which will let our simple game demo connect to the HubSpot API.
It’s just one command:
hs create module deal-fishing
? What should the module label be? Deal Fishing
? What types of content will this module be used in? Page
? Is this a global module? No
Creating ~/hubspot-local/hubspot-carnival/deal-fishing.module
Creating module at ~/hubspot-local/hubspot-carnival/deal-fishing.module
Fun! Let’s see what’s in there:
/deal-fishing.module:
> fields.json
> meta.json
> module.css
> module.html
> module.js
Modules are pretty simple. They’re just folders that end with a .module name, and they have to contain these five files.
Sync a module to HubSpot
From the deal-fishing.module folder, run:
hs watch . deal-fishing.module
After watch , we’ve got . for the root hubspot-local folder that we’re in, and we want it to show up in the HubSpot Design Manager as deal-fishing.module.
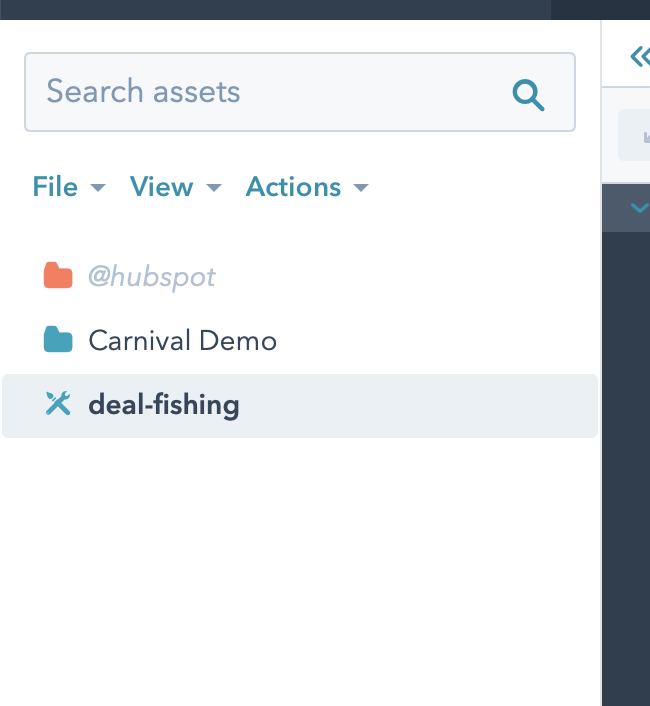
Let’s go see if it showed up. Sign into HubSpot with your sandbox account, then in the top bar, navigate from Marketing > Files and Template > Design Tools. You’ll see a sidebar that should show your new deal-fishing module:
Select it, and you’ll see an editor – it automatically displays the html, css and js files that we’ll be working in. You can happily work there for the rest of this tutorial, but I’ll be writing instructions for local development, where you can use your favourite shell and text editor.
Live updates to your module
Before we head back to our local development, we’re going to open the preview URL from the Design Manager.

There’s nothing there yet – just a sample “rich text field” and an empty page. But that’s where we’ll see our changes show up.
Head back to your terminal, and open module.html with your favourite text editor. Make sure that hs watch is still running, and edit the file to look as follows:
<!-- module html  -->
<div>Hello, world!</div>
Now save it, and you should see the changes show up immediately in your preview:
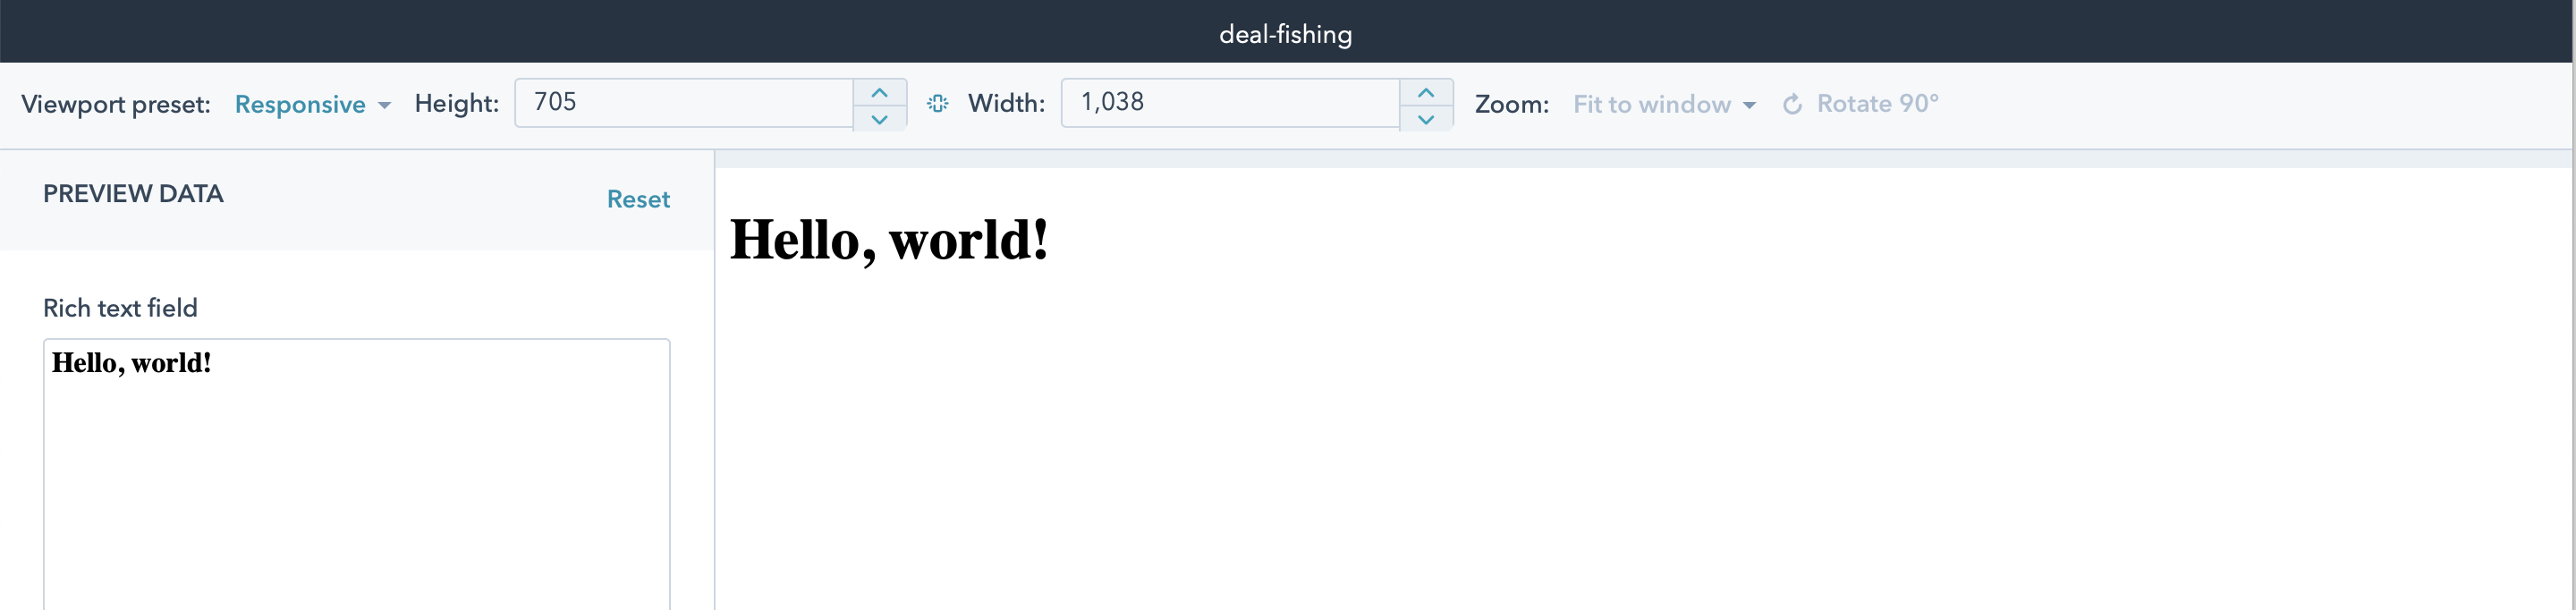
Great. Now that we’ve learned how to work locally with the HubSpot CMS, we’re ready to get working with Phaser!
Creating Deal Fishing
Introducing Phaser.js
Phaser.js is a JavaScript game framework that works in any modern browser. It handles many things for you, including display and graphics, physics (which includes gravity and collisions), and more – all by tracking game objects, and passing events between them. We’ll learn how to wire up your game objects so they do what you want them to.
Setup and loading of assets (like sprites, which are images that’ll turn into your characters, or sound effects) is handled in preload , and create is where you’ll turn those assets into actual game objects. Those two methods are run once, at the creation of the game instance.
After that, the game loop continuously calls the update function. We can also respond to events emitted by animations, game objects, and more – we just have to subscribe to them and pass them a callback. We’ll learn more about when it’s appropriate to use update as opposed to handling changes in an event-driven way with callbacks.
That’s probably enough introduction! What better way to learn how this all works than to just get started? We’ll walk through preload, create and update in turn.
Creating the Deal Fishing mini game
First, download the assets we’ll be using from this link:
// TODO
Unzip those, and add them to your hubspot-local folder. We’ll come back to the assets in a few steps.
Next, copy and paste this boilerplate into the module.js file that was created in your deal-fishing.module folder:
var config = {
    type: Phaser.AUTO,
    width: 800,
    height: 600,
    physics: {
      default: 'arcade',
      arcade: {
        gravity: { y: 0 },
        debug: false
      }
    },
    scene: {
        preload: preload,
        create: create,
        update: update
    }
};

var pond;
var pondGroup;
var player;
var fishingZone;

var cursors;
var spacebarHeld = false;

var score = 0;
var scoreText;

var fishText;

var game = new Phaser.Game(config);

function preload ()
{
	// this gets called once at the very beginning when `game` is instantiated
}

function create ()
{
	// this gets called once, after `preload` is finished
	// anything loaded in `preload` is guaranteed to be accessible here
}

function update ()
{
	// the game loop calls `update` constantly
}
In this skeleton, we create the game object by passing it a config, which defines some basic pieces of what our game will contain (such as having arcade physics with a gravity key with y set to 0 – meaning it’s a top-scrolling game). We also define the variables we’ll be using later on as we load, use, and update our game objects.
And in your module.html file, we’ll add a couple lines so that it looks like this:
{{ module.text }}
{{ require_js('https://cdn.jsdelivr.net/npm/phaser@3.24.1/dist/phaser.min.js', 'head')}}
So far, we’ve loaded Phaser via a CDN. The require_js template tag there is part of the HubL templating language. Using it in your code rather than <script> gives you some helpful automatic optimizations, like preventing you from accidentally loading the same library many times over all your modules. And for Phaser to work, we need to have it load in the header, so we pass in the head parameter here to indicate to the CMS where it should load the script.
Now, let’s look back at the live preview. You can treat this window just like you would any tab you were using for local development. You can open up your browser’s Developer Tools and examine the console. Also, you can take a peek at the source of the page to see how the CRM nicely merged your module.js code, imported the Phaser.js file, and got things ready.

Right now, all we can see is the "Hello, world!" heading. That’s because of our text field, which is accessible via the HubL template tag ``. If we want to change that to Deal Fishing, just click on the field on the left of the Previewer screen:
Easy. That whole field is in rich, styled text, so all relevant HTML tags are included with the template tag already.
Otherwise, there’s not a lot to look at. That’s because we haven’t yet added any assets! So let’s try that out in preload().
Getting our assets ready to use
Loading your assets
Phaser loads everything upfront using the preload() function. So open up your module.js file, and add the following to preload() :
function preload ()
{
	// this gets called once at the very beginning when `game` is instantiated
  this.load.image('ground', 'https://f.hubspotusercontent20.net/hubfs/REPLACE_ME/assets/map.png');
	this.load.spritesheet('pond', 'https://f.hubspotusercontent20.net/hubfs/REPLACE_ME/assets/pond.png', { frameWidth: 54, frameHeight: 39});
	this.load.spritesheet('tile', 'https://f.hubspotusercontent20.net/hubfs/REPLACE_ME/assets/tile.png', { frameWidth: 16, frameHeight: 16});

	this.load.spritesheet('fishA', 'https://f.hubspotusercontent20.net/hubfs/REPLACE_ME/assets/FishA.png', { frameWidth: 16, frameHeight: 16});

	this.load.spritesheet('player', 'https://f.hubspotusercontent20.net/hubfs/REPLACE_ME/assets/hero.png', { frameWidth: 16, frameHeight: 24});
}
It’s pretty straightforward code: we use the load instance store on the scene to load an image, and also some spritesheets, which we’ll soon add to our game and make visible.
However, you still need to upload your assets, and replace the REPLACE_ME section of the URL with your own account’s unique ID.
Uploading your assets to HubSpot’s File Manager
To upload your assets and make them available to your module, we’ll use HubSpot’s File Manager to help us serve the files and make them accessible to our module in the cloud. I’ll show you how to upload from the CLI, and then see those files in the File Manager.
In your terminal, you should be in your root hubspot-local directory, and it should look like this:
deal-fishing.module/
assets/
hubspot.config.yml
Now, we’ll just upload the assets folder to the File Manager with the following command:
hs filemanager upload assets assets
That’ll take our local assets folder and put it in a new top-level folder on the File Manager also called assets .
Now, open your sandbox account back up in HubSpot, and open the File Manager from the top navigation bar:
Marketing > Files and Templates > Files
That’ll show you a screen like this:
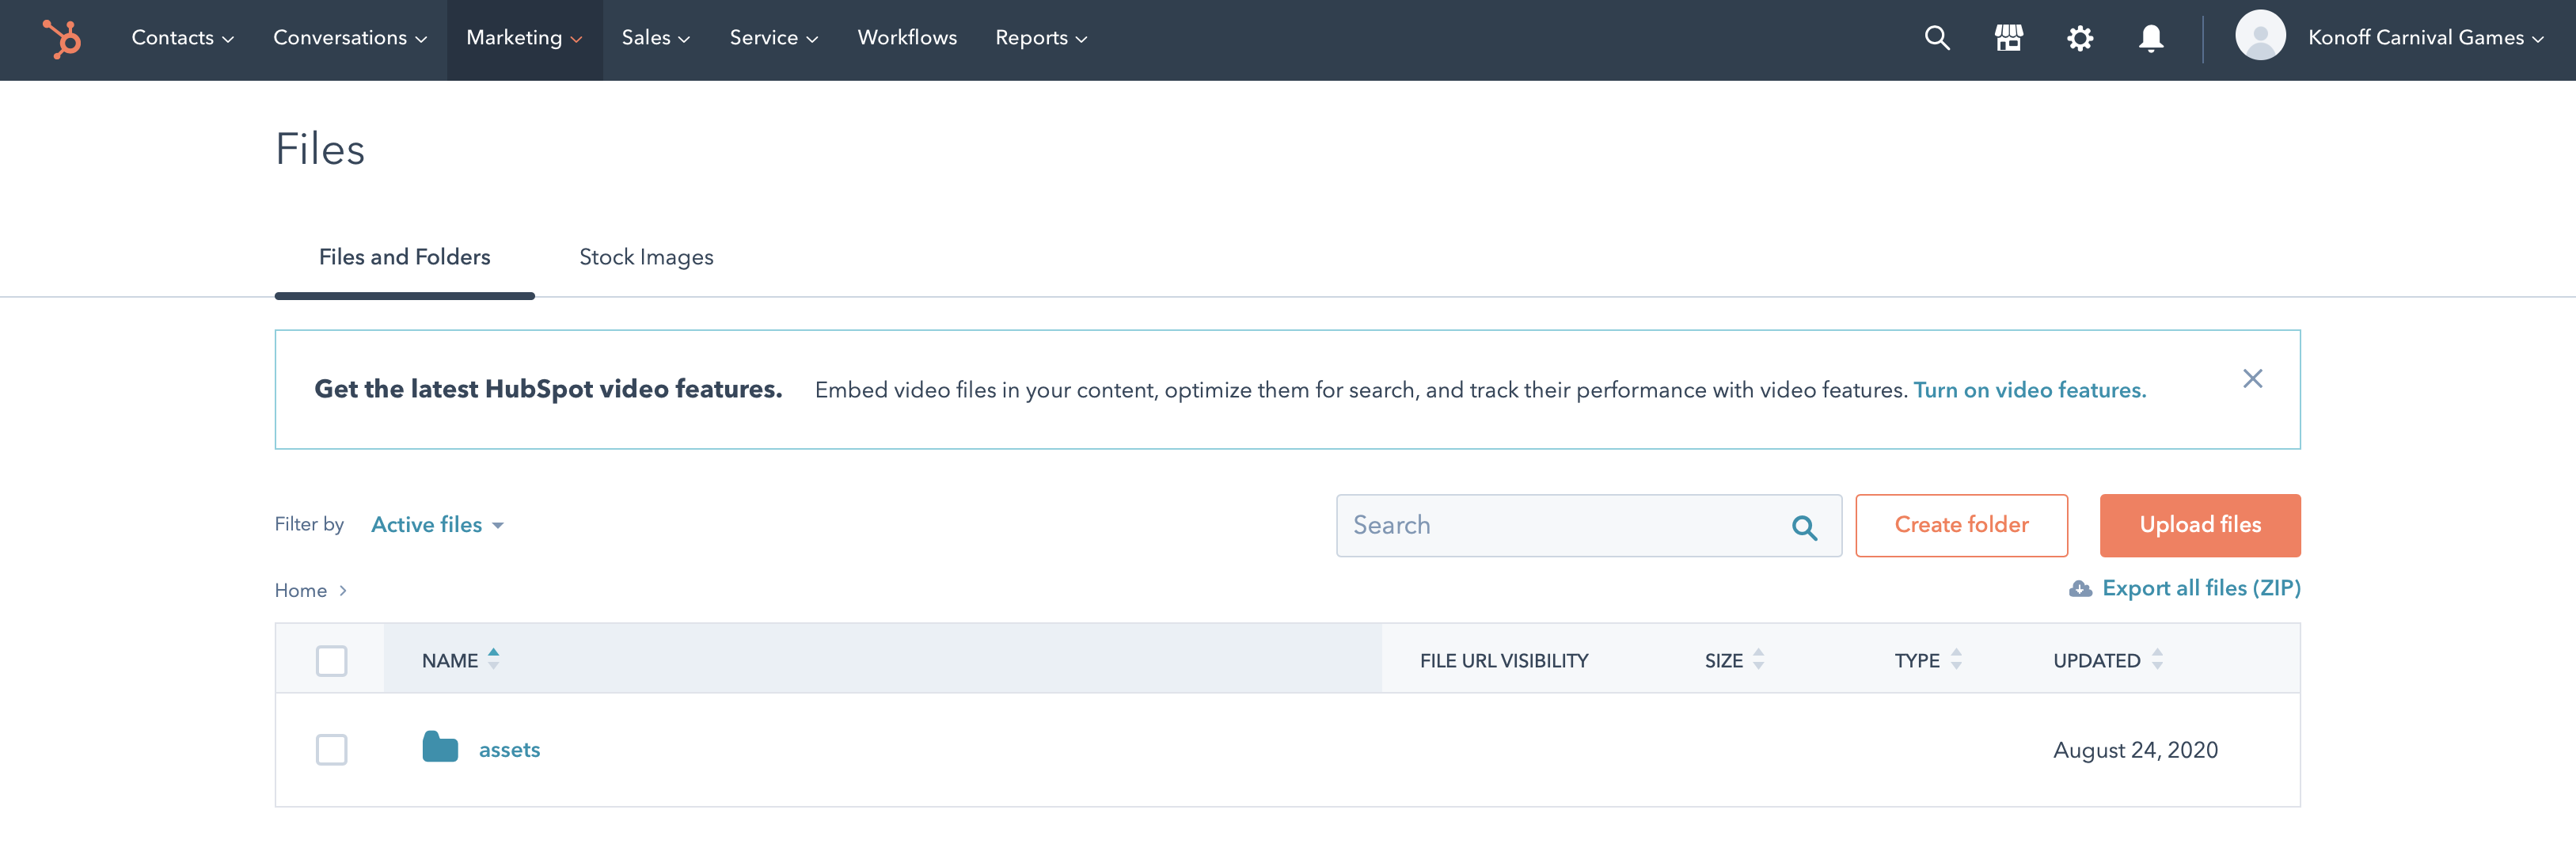
Great! It looks like it worked – you can see assets hanging out there. Now, open up the assets folder, and select any of the files. We’ll be using their URL to load the file into Phaser. When you’ve clicked on a file inside the assets folder, a sidebar opens. Press ‘Copy URL’:

That should give you a URL like https://f.hubspotusercontent20.net/hubfs/1234567/assets/atlas.png . Now we’re going to add that URL in front of our assets. Take the first part of the URL – the part before /assets/atlas.png , and add it to each load call URL so that your code looks like this:
function preload ()
{
	// this gets called once at the very beginning when `game` is instantiated
  this.load.image('ground', 'https://f.hubspotusercontent20.net/hubfs/1234567/assets/map.png');
	this.load.spritesheet('pond', 'https://f.hubspotusercontent20.net/hubfs/1234567/assets/pond.png', { frameWidth: 54, frameHeight: 39});
	this.load.spritesheet('tile', 'https://f.hubspotusercontent20.net/hubfs/1234567/assets/tile.png', { frameWidth: 16, frameHeight: 16});

	this.load.spritesheet('fishA', 'https://f.hubspotusercontent20.net/hubfs/1234567/assets/FishA.png', { frameWidth: 16, frameHeight: 16});

	this.load.spritesheet('player', 'https://f.hubspotusercontent20.net/hubfs/1234567/assets/hero.png', { frameWidth: 16, frameHeight: 24});
}
Bravo. You’ve written your first chunk of code for Phaser. Let’s walk through it!
this refers to the scene. A scene contains game objects – it’s a bit like the world that you’re immediately playing in. More complicated games can have several different scenes that the game will move you through (for instance, as you’d complete one level and move onto the next). But we’re going to do all our work in just one of them.
After that, we call the spritesheet and image methods. What’s the difference? Well, image just takes the whole image, figures out its dimensions, and pastes it on the screen. But if we want to create animations, or just select one piece of an image to create a game object from, we should use spritesheet . Our player uses a spritesheet, but the main part of the map just uses image .
Each spritesheet and image is passed two parameters. The first is the key we’ll use to refer to the asset in the future – for atlas.png , it’s ground .
Now we’re ready to start adding stuff to the map, and we’ll see our first game objects appear.
Creating your scene
Let’s take those assets and put them to use!
First, we’ll add our main map – the atlas.png image, which we’ve given a key of ground . Now, in create() , we’ll get to use it:
function create ()
{
	// this gets called once, after `preload` is finished
	// anything loaded in `preload` is guaranteed to be accessible here

  // a generic background tile
  this.add.tileSprite(400, 300, 800, 600, "tile");

  // the nicer background
  this.add.image(400, 300, 'ground').setScale(2);

  // the on-screen text for scores and fish info
  scoreText = this.add.text(700, 550, "Score: 0", { align: 'right', fontFamily: 'Helvetica', color: 'black' });
  fishText = this.add.text(400, 50, "Welcome to Deal Fishing!", { align: 'center', fontFamily: 'Helvetica', color: 'black' });
  fishText.setOrigin(0.5);

  // let's create the pond we'll fish in
  pondGroup = this.physics.add.staticGroup();

  pond = pondGroup.create(390, 420, 'pond', 0).setScale(2).refreshBody();

  // create player
  player = this.physics.add.sprite(100, 450, 'player').setScale(2).refreshBody();
  player.setCollideWorldBounds(true);

  // create a collider between the player and the pond
  this.physics.add.collider(player, pondGroup);

  // create a zone to track when the player can fish
  fishingZone = this.add.zone(pond.x, pond.y, pond.width + 2, pond.height).setScale(2);
  this.physics.world.enable(fishingZone);


  // player animations

  this.anims.create({
    key: 'sideways',
    frames: this.anims.generateFrameNumbers('player', { start: 0, end: 2}),
    frameRate: 10,
    repeat: -1
  });

  this.anims.create({
    key: 'down',
    frames: this.anims.generateFrameNumbers('player', {start: 8, end: 10}),
    frameRate: 10,
    repeat: -1
  });

  this.anims.create({
    key: 'cast',
    frames: [ {key: 'player', frame: 3}],
    frameRate: 20,
    repeat: -1
  });

  this.anims.create({
    key: 'up',
    frames: this.anims.generateFrameNumbers('player', {start: 4, end: 6}),
    frameRate: 10,
    repeat: -1
  });

  this.anims.create({
    key: 'caughtFish',
    frames: [{key: 'player', frame: 13}],
    frameRate: 20,
    repeat: -1
  });


  // pond animations
  this.anims.create({
    key: 'pondFishing',
    frames: this.anims.generateFrameNumbers('pond', {start: 1, end: 2}),
    frameRate: 1,
    repeat: -1
  });

  this.anims.create({
    key: 'pondStill',
    frames: [ {key: 'pond', frame: 0}],
    frameRate: 20,
    repeat: -1
  });

  this.anims.create({
    key: 'pondBite',
    frames: this.anims.generateFrameNumbers('pond', {start: 3, end: 4}),
    frameRate: 5,
    repeat: 4
  });

  // create cursors for the pond
  cursors = this.input.keyboard.createCursorKeys();
}
There are three broad sections here. The first is where we set up a few game objects and define how they interact: the player’s object, the pond, and the fishing zone. The player and pond are both visible, but the zone isn’t – it’s an invisible layer that is just a teensy bit bigger than the pond, which we use to check for overlaps later on. We also set up some collisions and physics interactions there.
The second section is where we create a bunch of animations for the player and the pond. That’ll help us communicate what’s happening to the player. It’s one thing to have game logic that works, but without making it obvious through animations, it’s not that helpful! Each animation is tied to the above assets that we loaded in preload() - we generate an animation from spritesheets we created there. We also give each animation its own key so that we can easily use it later on.
Also, every animation has a -1 repeat value, except for the pondBite animation. Why is that? Because -1 means the animation repeats indefinitely, we’ll have to manually stop those animations or change the animation to another one. For pondBite, we want it to run for a limited amount of time so as to make the game harder. So it repeats 4 times, for a total of about 1 second. After all, fish don’t hold on forever.
Finally, we need some way to notice what the player does, so we create inputs using the cursors variable.
If you save your module.js file now, that should show up immediately in your Previewer – but it’s probably boring to play, as we haven’t done anything with the inputs yet:

That means we better go and get the player inputs working, as well as trigger specific animations in response to the right inputs.
Handle inputs and trigger animations
function update ()
{
  if (player.state != "fishing") {
    // movement should be allowed when they're not actively fishing
    if (cursors.up.isDown) {
      player.setVelocity(0, -160);

      player.anims.play('up', true);
    } else if (cursors.down.isDown) {
      player.setVelocity(0, 160);

      player.anims.play('down', true);
    } else if (cursors.left.isDown) {
      player.setVelocity(-160, 0);

      player.setFlipX(false);
      player.anims.play('sideways', true);
    } else if (cursors.right.isDown) {
      player.setVelocity(160, 0);

      player.setFlipX(true);
      player.anims.play('sideways', true);
    } else {
      // if the above keys are being pressed, the user shouldn't be moving
      player.setVelocity(0, 0);

      player.anims.pause();
    }
  }

  // the player pressed space while inside the fishing zone, and isn't already holding the spacebar
  if (cursors.space.isDown && (this.physics.world.overlap(player, fishingZone)) && spacebarHeld === false) {
    spacebarHeld = true;
    console.log("Fishing!")

    if (player.state === "fishing") {
      // The player is currently fishing
      if (pond.anims.getCurrentKey() === "pondBite") {
        // they pressed space while there was a fish biting
        // successful catch!
        // first, create a fish object
        fish = this.physics.add.sprite(pond.getCenter().x, pond.getCenter().y, 'fishA', 4).setOrigin(0.5, 0.5).setScale(3).refreshBody();
        // then animate it up to the top of the player's head
        var tween = this.tweens.add({
          targets: fish,
          x: player.getTopCenter().x,
          y: player.getTopCenter().y,
          ease: 'Linear',
          completeDelay: 1000,
          onComplete: function () {
            fish.destroy();
            player.state = "normal";

            // TODO: POST new fish here
          }
        });

        // now we'll show the player celebrate
        player.anims.play('caughtFish', true);

        // we'll clear the pond's animation chain and reset everything
        pond.anims.stop();
        pond.anims.play('pondStill');
      } else {
        // the player missed the fish bite :(
        // now to stop fishing
        player.anims.play('sideways', true);

        pond.anims.play('pondStill', true);

        player.state = "normal";
      }

    } else {
      // The player should begin fishing!
      player.anims.play('cast', true);

      pond.anims.play('pondFishing');

      pond.anims.chain('pondBite');

      pond.anims.stopAfterDelay(Phaser.Math.Between(2000,4000));

      pond.on('animationcomplete-pondBite', finishedFishing);
      pond.anims.chain('pondFishing');

      player.state = "fishing";
    }

  } else if (cursors.space.isUp) {
    spacebarHeld = false;
  }
}

function finishedFishing (animation, frame, gameObject)
{
  if (player.state === 'fishing') {
    // stop the current animation
    pond.anims.stopAfterDelay(Phaser.Math.Between(2000,4000)); // random

    // add a new animation
    pond.anims.chain('pondBite');
    pond.anims.chain('pondFishing');

  }
}
That’s it – you’ve got a working game now!
The game continuously loops and calls the update() function. So, that’s where we respond to user-initiated input. Here, we have to basic sections. In the first set of conditions, we’re just making sure the user isn’t already fishing, and handle all the movement-based inputs behind that logic.
In the second set of conditions, we’re watching to see when we should get the user to start fishing, catch a fish, and stop fishing if they miss the fish. We create an animation chain that will show a fishing animation, then after a random amount of time will show the pondBite animation for a brief moment (remember: it runs for a limited amount of time, unlike the other animations), before returning to the typical fishing animation. In order to keep that going, we also have to create a callback, and so we subscribe to the animationcomplete-pondBite event. We get it to call the finishedFishing() function, where we then set up this same animation chain all over again if the player missed the opportunity to catch the fish on the first bite.
To keep track of what happens, we check what the player.state property is set to, as well as check what animation is playing. That’s all it takes to make a game!
Winning the game
When the player successfully catches the fish by pressing space when the pondBite animation is playing, we create a fish object, then animate it towards the player object using a tween object. It’s an object managed by the scene which allows us to manipulate values over time. We use it to change the x and y position of the fish, then pass an onComplete callback to destroy the fish and reset the player state to "normal" after a delay. Then they can go fish again.
That onComplete callback is also where we’ll be posting the fish to the Serverless Function that we’ll be making shortly. Take note:
…
onComplete: function () {
  fish.destroy();
  player.state = "normal";

  // TODO: POST new fish here
}
…
That’s it! If you open up your Previewer tab again, you can move your player around, get them to either side of the pond, and press spacebar to start fishing. Happy fishing, everyone!
Introducing Serverless Functions
Setting up the Serverless Function
hs create function "fishing-deals"
? Name of the folder where your function will be created: fishing-deals
? Name of the JavaScript file for your function: post-deals
? Select the HTTP method for the endpoint: POST
? Path portion of the URL created for the function: deals
Created "/Users/konoff/Developer/hubspot/1-deal-fishing/hubspot-components/fishing-deals/..functions"
Created "/Users/konoff/Developer/hubspot/1-deal-fishing/hubspot-components/fishing-deals/..functions/post-deals.js"
Created "/Users/konoff/Developer/hubspot/1-deal-fishing/hubspot-components/fishing-deals/..functions/serverless.json"
[SUCCESS] A function for the endpoint "/_hcms/api/deals" has been created. Upload "..functions" to try it out
Now, we’ll go into the fishing-deals/fishing-deals.function folder, and open up post-deals.js. That’s where our function lives. Every time we get a call to _hcms/api/deals, it runs the code in here. At the beginning, it just looks like this:
exports.main = ({ accountId, body, params }, sendResponse) => {
  console.log('Your HubSpot account ID: %i', accountId);
  sendResponse({
    statusCode: 200,
    body: {
      message: 'Hello, world!',
    },
  });
};
We’re going to make a few changes: we’ll create a random name for the fish, give it a score, post it to the HubSpot CRM (which we’ll use as our datastore), and return a 201 instead of a 200, as well as the score and name.
Add your API key
Before all that, let’s get your API key added to your CLI, then safely bundled into your Serverless Function.
First, head to your Account Settings to grab your API key. Make sure you select the appropriate sandbox account. You may have to create an API key if you haven’t before, then copy it.
Now, in your terminal, we’ll add the secret to the HubSpot CLI, which in turn makes it available in your cloud environment:
hs secrets add hubapikey YOUR_API_KEY
The secret "hubapikey" was added to the HubSpot portal: 8311725
Now, open up the serverless.json file in your function folder. We’ll add the name of the secret there, inside the secrets array:
{
  "runtime": "nodejs12.x",
  "version": "1.0",
  "environment": {},
  "secrets": ["hubapikey"],
  "endpoints": {
    "deals": {
      "method": "POST",
      "file": "post-deals.js"
    }
  }
}
That’s all we need to do to make hubapikey available in the function as an environment variable.
Back to the post-deals.js file, we’ll set it up to create a new contact each time you catch a fish:
var request = require("request");

var fishNames = ["Nemo",  "Bubbles",  "Jack",  "Captain",  "Finley",  "Blue",  "Moby",  "Bubba",  "Squirt",  "Shadow",  "Goldie",  "Dory",  "Ariel",  "Angel",  "Minnie",  "Jewel",  "Nessie",  "Penny",  "Crystal",  "Coral"]
var colors = ["White", "Yellow", "Blue", "Red", "Green", "Black", "Brown", "Azure", "Ivory", "Teal", "Silver", "Purple", "Navy", "PeaGreen", "Gray", "Orange", "Maroon", "Charcoal", "Aquamarine", "Coral", "Fuchsia", "Wheat", "Lime", "Crimson", "Khaki", "HotPink", "Magenta", "Olden", "Plum", "Olive", "Cyan"]

exports.main = ({ accountId, body, params }, sendResponse) => {
  console.log('Your HubSpot account ID: %i', accountId);
  console.log('Your fish size: ' + body.fish_size);

  var firstName = fishNames[Math.floor(Math.random() * fishNames.length)];
  var lastName = ("Mc" + colors[Math.floor(Math.random() * colors.length)]);

  console.log("The API key: " + process.env.hubapikey);

  var options = {
    method: 'POST',
    url: 'https://api.hubapi.com/crm/v3/objects/contacts',
    qs: {hapikey: process.env.hubapikey},
    headers: {accept: 'application/json', 'content-type': 'application/json'},
    body: {
      properties: {
        firstname: firstName,
        lastname: lastName,
        annualrevenue: body.fish_size
      }
    },
    json: true
  };

  request(options, function (error, response, body) {
    if (error) throw new Error(error);

    console.log("The " + firstName + " " + lastName + " contact was successfully created");

    sendResponse({
      statusCode: 201,
      body: {
        fish_name: (firstName + ' ' + lastName),
        score: body.properties.annualrevenue,
        message: ('Your fish is named ' + firstName + ' ' + lastName)
      },
    });
  });
};
From the top to the bottom, let’s walk through how our function works.
First, we import request using require(). That’ll let us make a POST request to the HubSpot /contacts API, which you can read more about here. Then we create a couple arrays to make some creative fish names.
Inside the exports.main method, we first log a couple helpful things, which we’ll be able to see in the logs. Then we create a first and last name, and add those to a request. Finally, we handle the request. If there’s no error, we use sendResponse() to send the saved fish name, score, and a helpful message back to the client.
Now we’re going to get a webpage going, so that we can test out the Serverless Function, and share our new working game.
Testing and publishing your game
Creating a Template
Templates allow you to combine as many modules as you’d like into a
Head back to your root hubspot-local folder, and create a new template in the CLI:
hs create template deal-fishing-demo
? Select the type of template to create: page
Creating file at ~/hubspot-local/deal-fishing-demo.html
That creates a simple deal-fishing-demo.html file. Open it up – you’ll see there’s already a special comment at the top indicating that it’s a template. Next, replace the template’s HTML with this:
<!--
    templateType: page
    label: Deal Fishing template
    isAvailableForNewContent: true
-->
<!doctype html>
<html>
  <head>
    <meta charset="utf-8">
    <title>{{ content.html_title }}</title>
    <meta name="description" content="{{ content.meta_description }}">
    {{ standard_header_includes }}
  </head>
  <body>
    {% module "module_YOURMODULENUMBER" path="/deal-fishing-tutorial", label="deal-fishing-tutorial" %}
    {{ standard_footer_includes }}
  </body>
</html>
We changed the label up top to be something easier to find, but the important line here is the first line in <body>. You’ll have to grab your module’s unique ID back in the Design Manager – just open the deal-fishing module in there, and scroll down to the bottom of the sidebar to copy a module template snippet:

Alternatively, if you have your Previewer tab open, you can just replace the module_YOURMODULENUMBER part of the template code with the final part of your Previewer’s URL. My URL is https://app.hubspot.com/design-previewer/1234567/modules/34070159116, so I’d change that to module_34070159116.
Now, we’ll create a new page using the template you just made. In the top bar, go to Marketing > Website > Website Pages, and press Create in the top right corner, then select Website page.
With the search bar in the top right, let’s search for “Deal Fishing template” and select that template. Finally, give it a name – maybe Deal Fishing Game. Click Create Page, then we’re nearly done.
But it won’t let us press publish yet. You’ll need to head to the Settings bar and do two things there. First, add a Page Title. Then copy the link to the page. Finally, press Publish, and open up your brand new page:
From the page link we just copied, we’re only going to copy the subdomain part of that URL:
http://yoursandboxusername-1234567.hs-sites.com
In this case, it’d be yoursandboxusername-1234567. That’s all we need to be able to call our Serverless Function from within the app. Keep that tab around just so we can test it.
Putting it all together
It’s time to put it all together by calling the function in our game’s code. Head back to your module.js inside the deal-fishing.module folder, and find the comment called // POST new fish here, inside the update() function. There, you should add this code:
// POST new fish here
fetch("//YOUR_SITE_SUBDOMAIN.hs-sites.com/_hcms/api/deals", {
  method: "POST",
  headers: {
    'Content-Type': 'application/json'
  },
  body: JSON.stringify({ fish_size: Phaser.Math.Between(75, 250)})
}).then(res => {
  return res.json()
}).then(data => {
  console.log(data);

  // update the score
  score += data.score;
  scoreText.setText("Score: " + score);

  // create a message about the fish you caught
  var fishSize = data.score;

  var fishMessage;
  if (fishSize > 200) {
    fishMessage = "You caught a huge fish!";
  } else if (fishSize > 100) {
    fishMessage = "You caught a very medium fish!";
  } else {
    fishMessage = "You caught a tiny little fish!";
  }
  fishText.setText(fishMessage + "\n" + data.message + ".");
});
Replace the YOUR_SITE_SUBDOMAIN with the page, save your changes, and refresh the new hs-sites.com page you created. If you open up your console in that tab, you’ll see something like this:

Finally, you can check your logs using the CLI. Just pass it the name of your serverless function – fishing-deals, in this case:
hs logs fishing-deals
2020-09-02T23:02:25.861Z - SUCCESS - Execution Time: 1853ms
{ body:
   { score: '200',
     message: 'Your fish is named Squirt McYellow',
     fish_name: 'Squirt McYellow' },
  statusCode: 201 }
2020-09-02T23:02:26.758Z	INFO	Your HubSpot account ID: 8311725
2020-09-02T23:02:26.765Z	INFO	Your fish size: 197
2020-09-02T23:02:26.765Z	INFO	The API key: YOUR_API_KEY
2020-09-02T23:02:27.686Z	INFO	The Squirt McYellow contact was successfully created
That’s it! In a coming tutorial, we’ll learn how to create scoreboard that’ll add up all our contacts annualrevenue property values to give us our high score for the day. For now, just enjoy the great outdoors and the HubSpot Carnival.
https://knowledge.hubspot.com/contacts/hubspots-default-contact-properties?_ga=2.230543132.1282486909.1598903654-1418744260.1597871852